Geometric Constructions — Definition, Methods & Examples
What is geometric construction?
Geometric construction allows you to construct lines, angles, and polygons with the simplest of tools. You will need paper, a sharpened pencil, a straightedge to control your lines, and a drawing compass to swing arcs and scribe circles.
Make sure your drawing compass has a sharp needle on one arm and a sharpened pencil on the other arm. Practice swinging the drawing compass, so you are familiar with setting the needle on a given point, adjusting the arms, and swinging arcs.
Drawing a line, line segments, and rays
The straightedge and pencil are your tools for drawing straight lines, line segments, rays and sides of polygons. Adding the drawing compass allows you to copy any of those constructions accurately and faithfully.
To draw a straight line, hold the straightedge in your non-dominant hand with your fingers splayed on the top to push downward, holding the straightedge in place. This keeps your fingers out of the path of the pencil.

Drawing a straight line Hold the pencil in your writing hand, the tip against the straightedge and the pencil nearly vertical. This keeps the point tight against the straightedge as you smoothly and carefully run the pencil along the straightedge. Avoid wagging or wavering the pencil to keep your line straight.
Once the line is drawn, label endpoints for line segments, identifying points for lines, and one each (one endpoint, one identifying point along the ray) for rays. Remember to use arrowheads for lines and rays.
Copying a line segment
Every line is a copy of every other line; each is limitless in two directions, so that is no challenge. Copying a line segment requires the drawing compass, pencil, and straightedge.
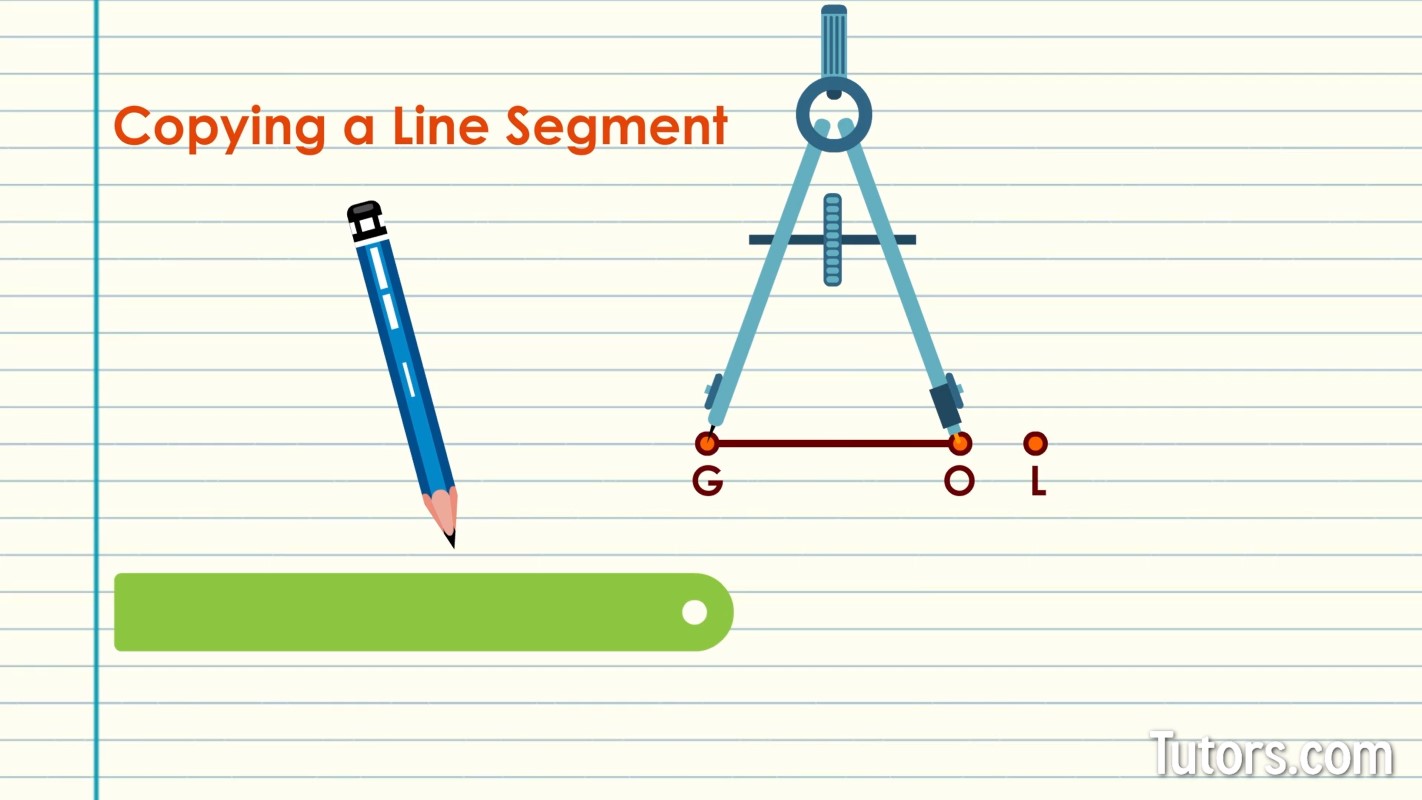
Next to the existing line segment, draw a new point. Call it Point L.
Place your drawing compass needle on Point G, open it to reach Point O, and carefully lift it up.
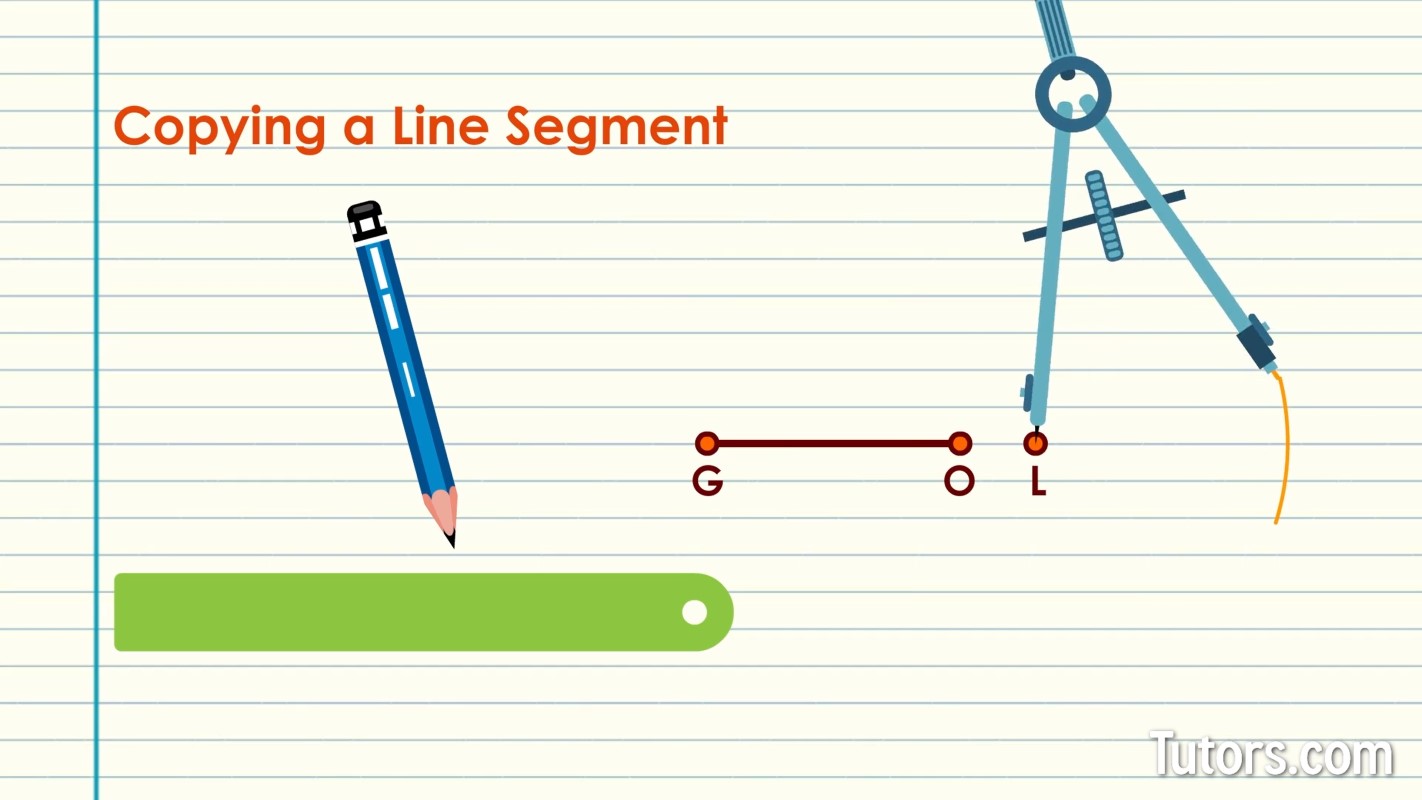
Relocate the needle on Point L. Swing an arc out to the right, using the exact setting that was the distance of the original line segment GO.
Use your straightedge to draw a line segment from Point L to any spot on the arc.
Your new line segment is identical in length to your original!
Label its endpoint Point D, and you are good as GOLD.
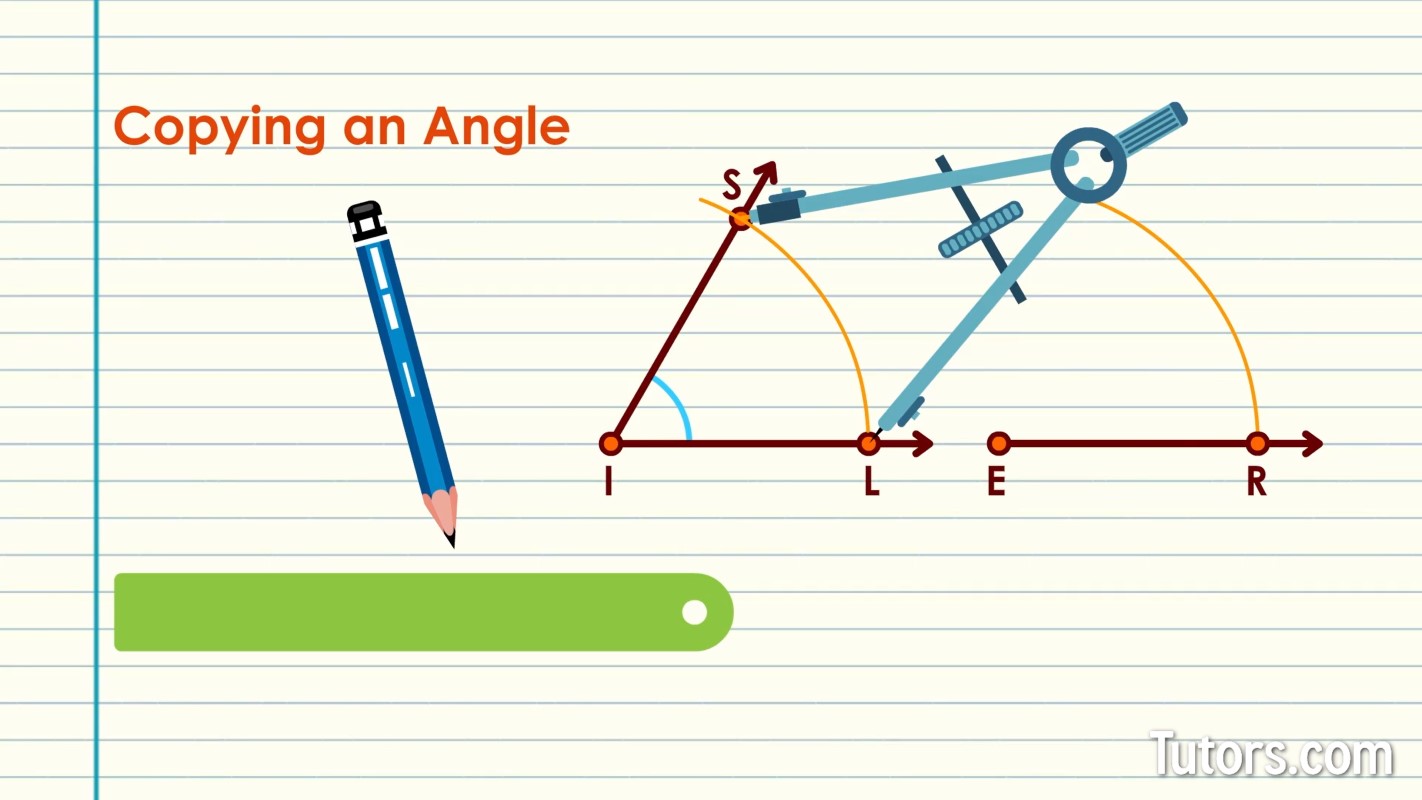
How to copy an angle
Here we have two rays sharing the common Point I. Rays SI and LI form an angle, ∠SIL or ∠I.
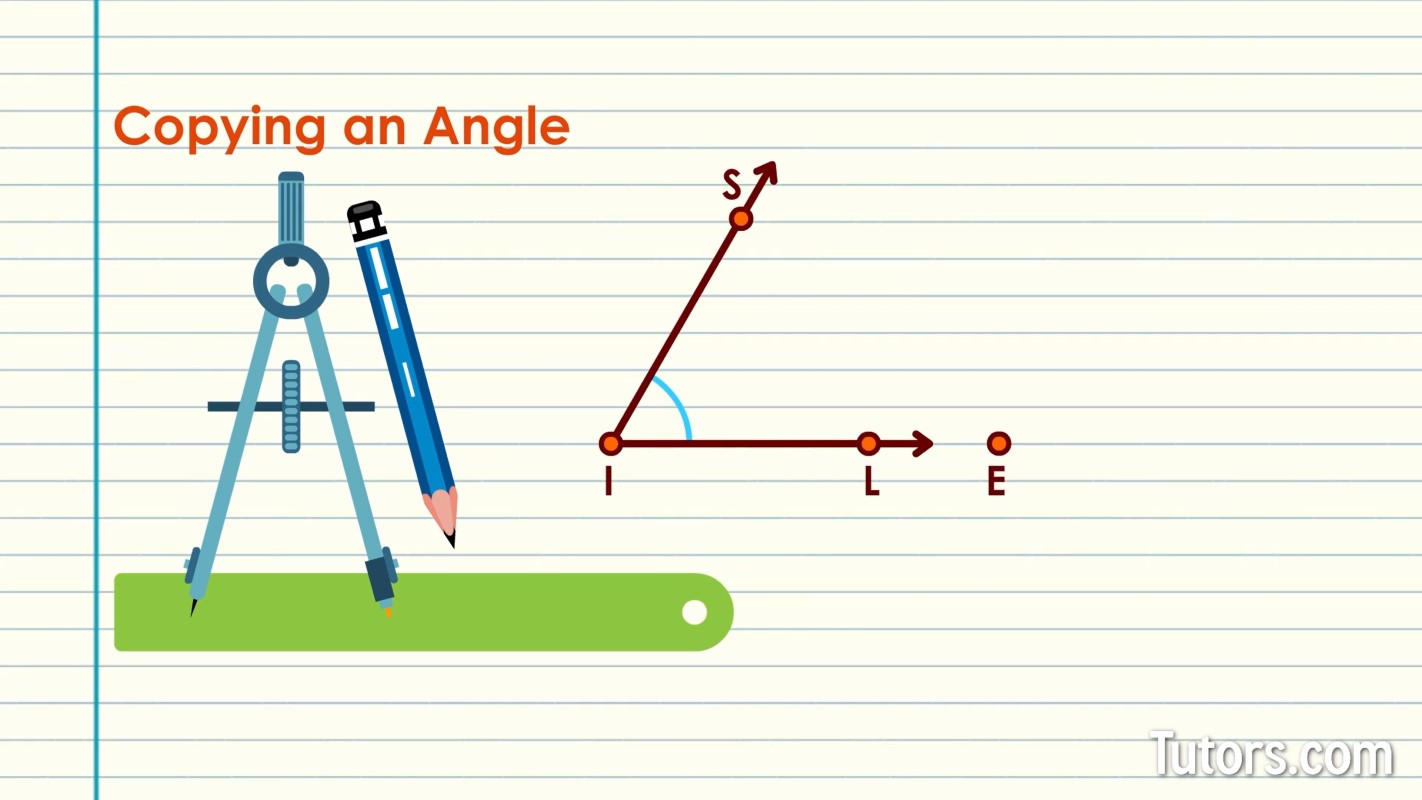
Draw a new point, which will be our new vertex, off to the right. We will label it Point E.
Use the straightedge to draw a line from Point E off to the right, with an identifying point along it.
Label it Point R, and put an arrowhead on the right end.
These next steps are tricky. You will be using only the drawing compass to measure and copy distances from the original angle to the new one.
Open your drawing compass up, so you reach from Point I along the two rays very nearly to their neat little arrowheads.
Swing the compass to run a single arc across the original rays SI and LI.
Without disturbing the compass setting, relocate it to Point E on your new ray.
Swing the compass up so, visually, you are fairly certain to have drawn an arc at least the size of the first arc.
Go back to the first angle, ∠SIL, and put the needle on one of the intersections of a ray and the arc.
Open or close the compass, so the other arm reaches the other intersection of the arc and the other ray.
Without adjusting the compass, relocate the needle to your new construction.
Swing an arc that intersects with the arc you previously drew from the vertex, Point E.
Where it crosses the other arc, you have found a point that will be along the new ray from Point E upwards and to the right!
Connect Point E to that new point, call it Point V.
Put an arrowhead on the ray. You now have an angle identical to ∠SIL called
∠VER. You shine like SILVER!
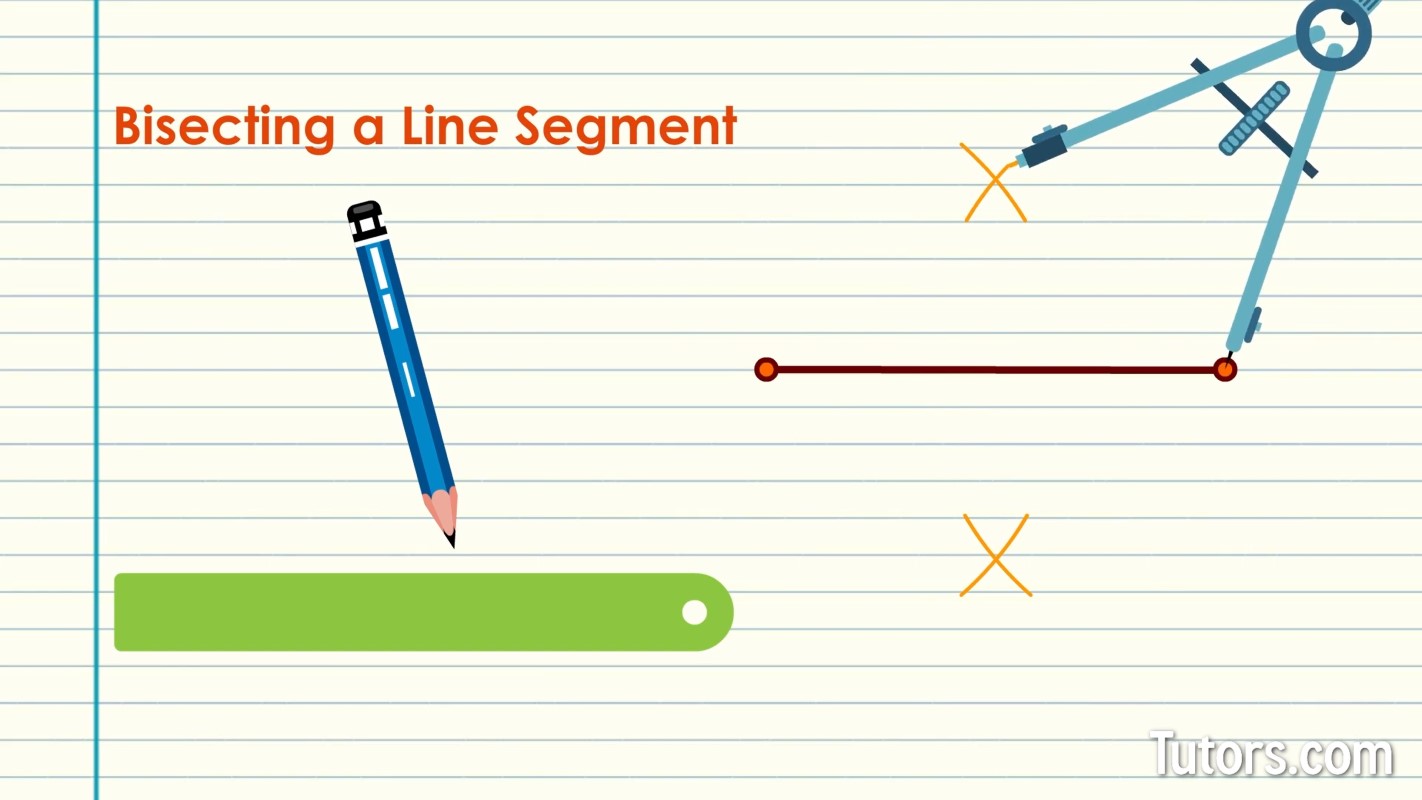
Bisecting a line segment
You can use a compass to bisect an angle or a line segment.
For a line segment, open the compass to a bit more than half the line segment's length (visually, not by measuring).
Place the needle on one endpoint and swing an arc above and below the line segment.
Relocate the compass to the other end of the line segment and repeat the swing.
The points where the two arcs intersect above and below the line segment are the two points to connect with your straightedge.
That straight, perpendicular line will bisect the line segment!
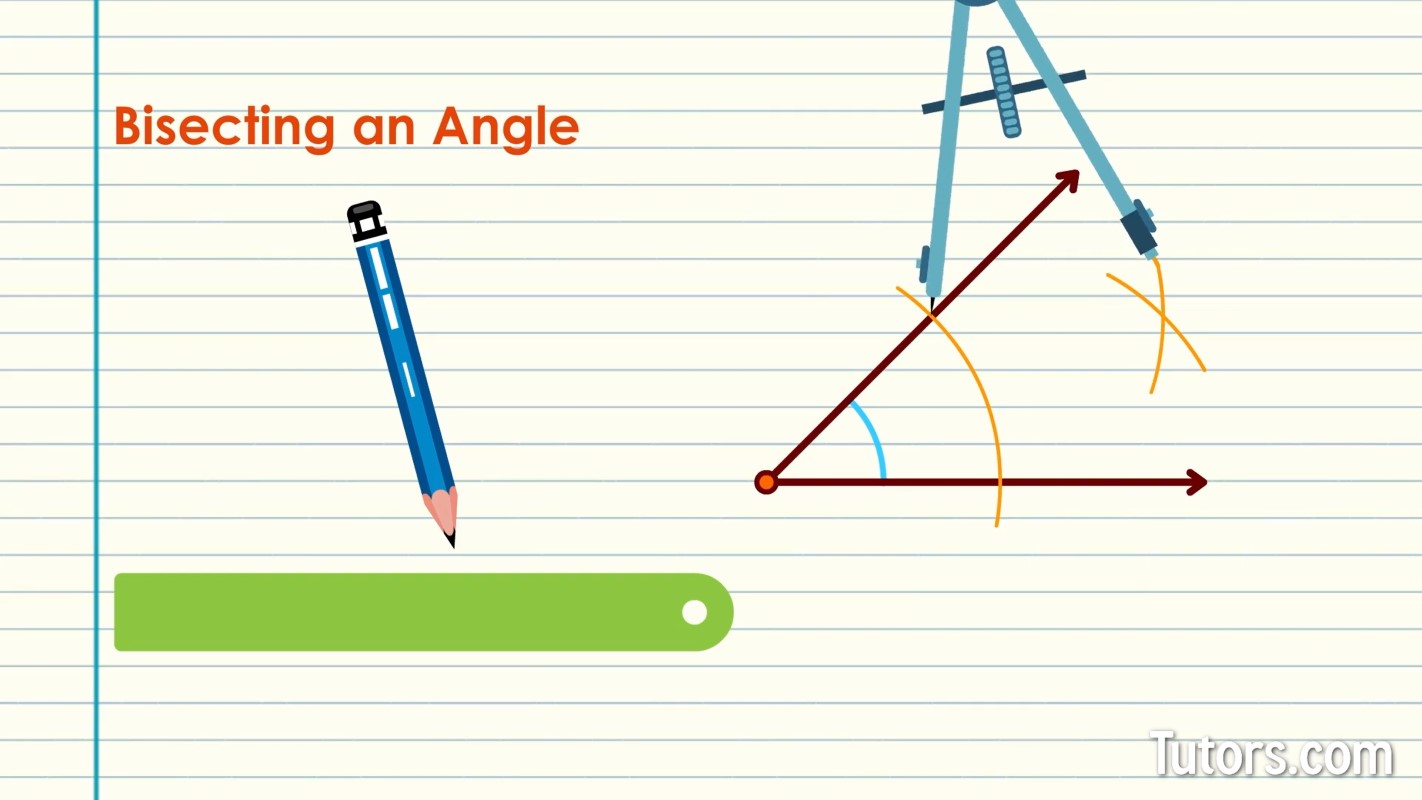
Bisecting an angle
For an angle, hold the needle of the compass on the vertex. Open the compass to stretch most of the way along one ray.
Swing an arc that crosses both rays.
Without adjusting the compass, relocate the needle arm to the intersection of the arc and one ray.
Swing an arc in the angle's interior area.
Without adjusting the compass, relocate the compass to the other ray, where the first arc intersected.
Swing an arc.
Where the two arcs intersect, that point is an endpoint of a line segment that bisects the angle. Connect it with a straightedge to the vertex point.